

Exercise One: Getting to Know Your Brushes
For this exercise, I gathered a varied range of paint brushes to experiment in my sketchbook with. I didn’t become too involved with these experiments, rather allowing my hand to flow as it would across the page and to create any marks which came naturally. I chose a different colour for each type of brush, starting with a very light colour and finishing with a much darker colour so as to distinguish between the types of brushes.
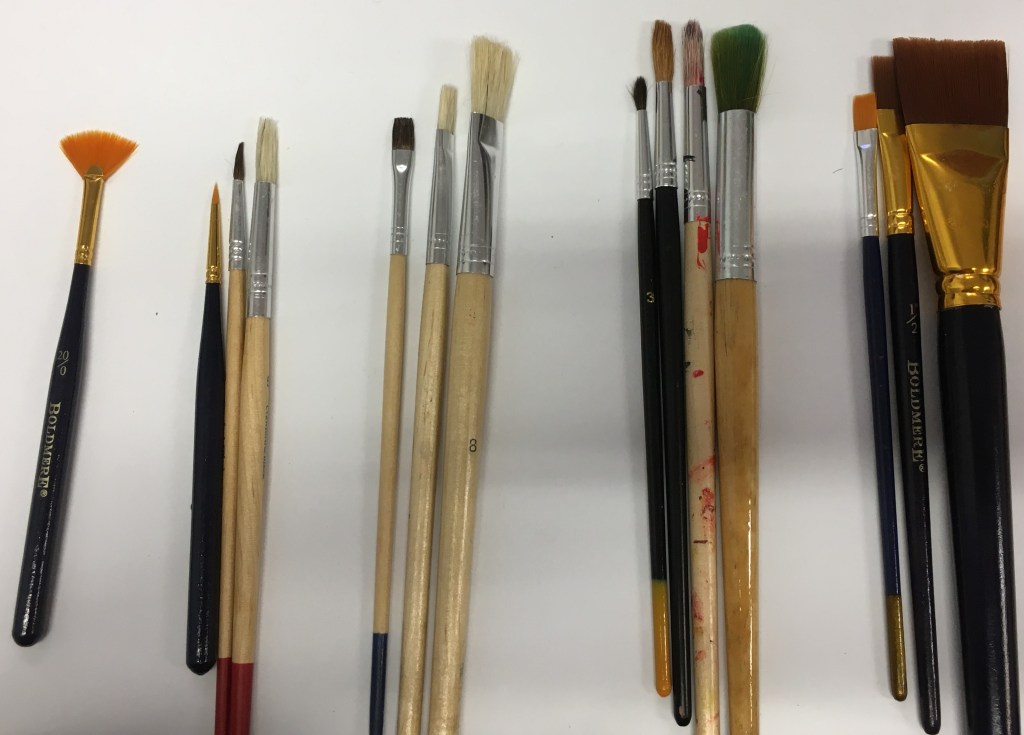
Range of Paintbrushes Used 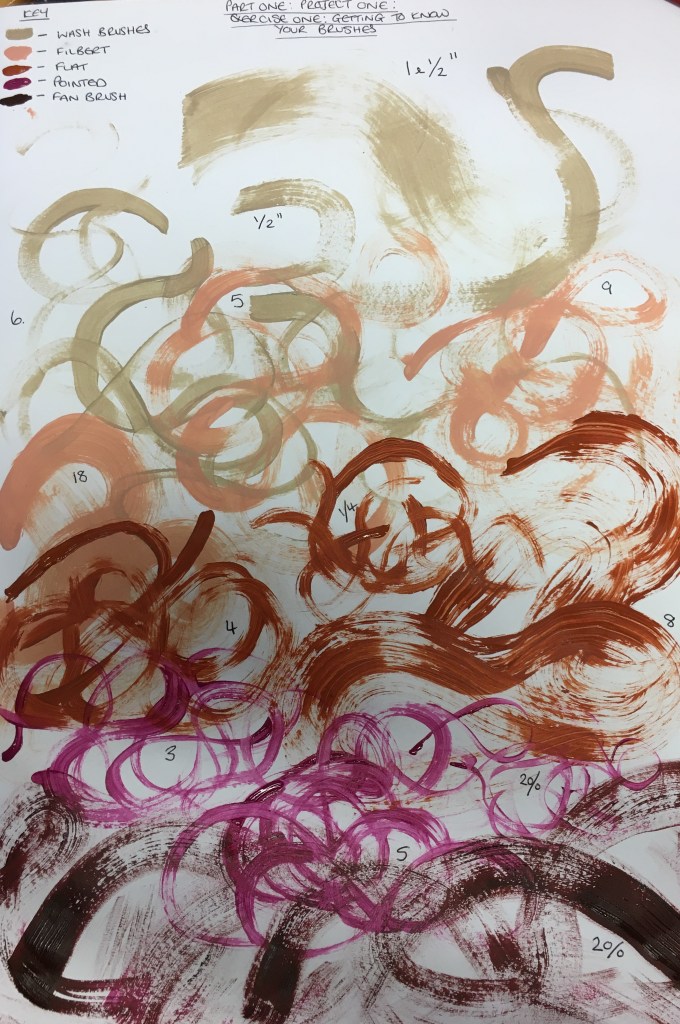
Range of Brush Marks
I found the range of marks created to be very interesting and very smooth in their flow. I appreciate that the paints were in their thickest form and so the blending when the lines tapered off was rather bitty and rough, as opposed to smooth and still solid, which I believe would have occurred had I used some water to dilute them somewhat.
Quick Landscape Experiment using Different Brushes and Techniques
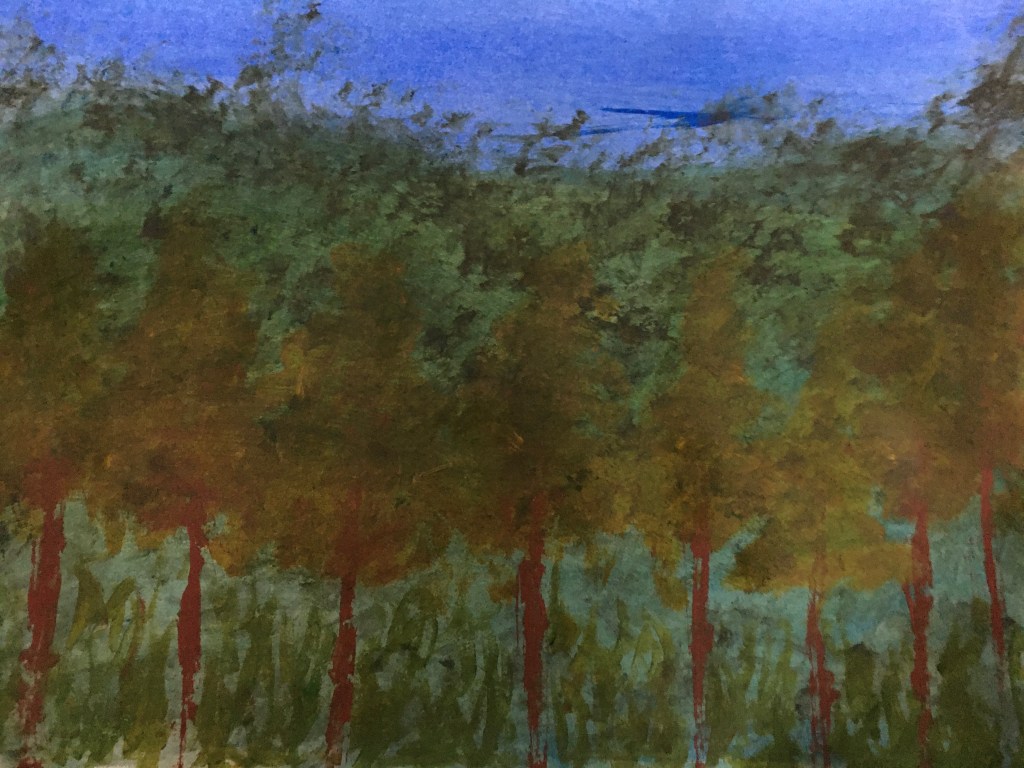
For this exercise, I didn’t want to create a very in-depth piece and didn’t really apply much effort beyond experimenting with the techniques found earlier in this exercise and had decided to keep the piece rather juvenile and lacking in detail. I decided to use a piece of cartridge paper and did not prepare it with any gesso etc.
I began by using a wash brush to apply the blue for the sky, using long swipes of colour across the page and then repeated this process with a layer of green to create the base for the grass. I then used a natural sponge to dab a darker layer of green across the base green to create the illusion of shrubbery. Next, I used a palette knife to apply brown paint in the shape of tree trunks and finished the trees by using a filbert brush to apply a layer of yellow paint as the leaves on the trees, using a swishing motion and then dabbing. Finally, I used a fine pointed brush to create the effect of grass in the foreground.
Whilst the end result is far from being a masterpiece and the grounds appear to all blend into one, I used this exercise to purely experiment with the layering and techniques discovered earlier. I found it rather fun to create and feel as though I have broken through an initial barrier and ‘broken the ice’ so to speak with my paints and brushes! This was a nice way to ease me into the course and I shall use it as a reference point moving forward.
Piece of Fruit using Different Brushes and Techniques
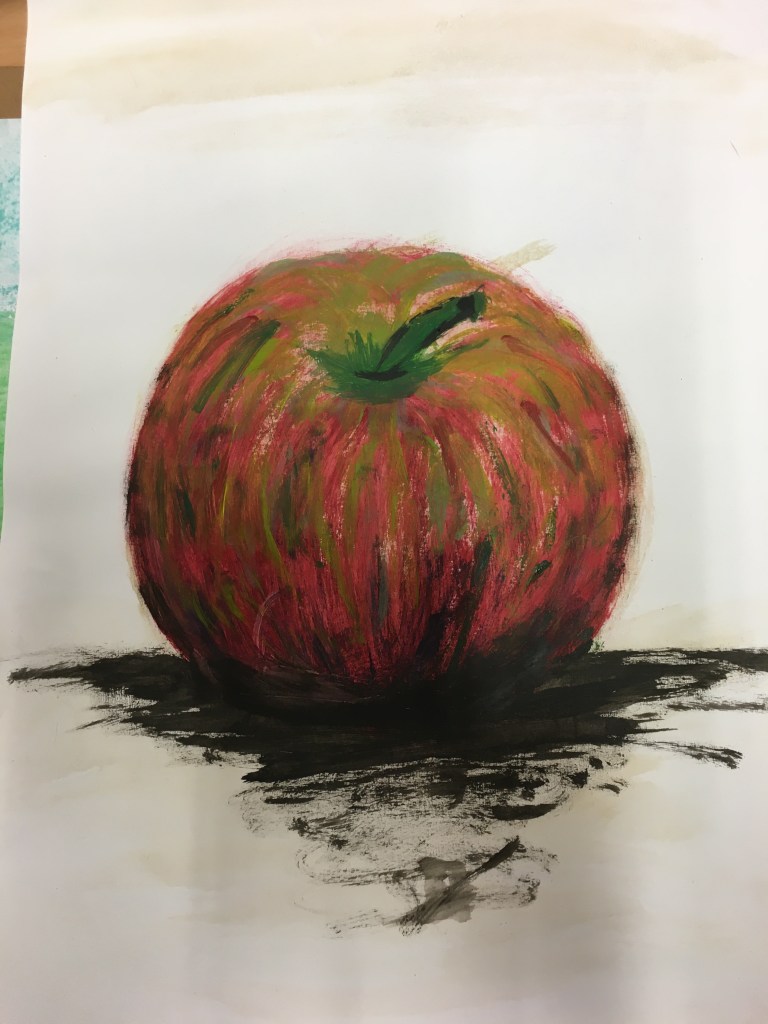
Whilst the end result of this experiment is very juvenile and inaccurate, I really enjoyed using the brushes to create it. The apple looks much more like a tomato and I know the paint has been applied too heavily and that there is a very clear lack of reflection and depth. However, the finished piece was not meant to be perfect as I was focussing on the actual application techniques as opposed to the detail and information of the apple itself.
It is bizarre as I used to feel very ‘at home’ with a paint brush and paint, however, the tools felt almost alien to me since I had not painted in a very long time. Creating these pieces felt more to me like relearning how to write with my non-dominant hand. Whilst the finished result is quite poor, the effort and energy used to create it was much more important to me in reawakening and remembering something which had laid dormant for a very long time.
Exercise Two: Applying Paint without Brushes
I decided for this exercise to create some scraping, layering, texture and blending experiments. I tried to find several different things I can use as tools and settled upon the following:
- Folded and scrunched paper;
- Debit card;
- Paper clip;
- Palette knife;
- Scrunched plastic bag;
- Scrunched paper towel;
- Scrunched tissue;
- Scrunched green paper towel.
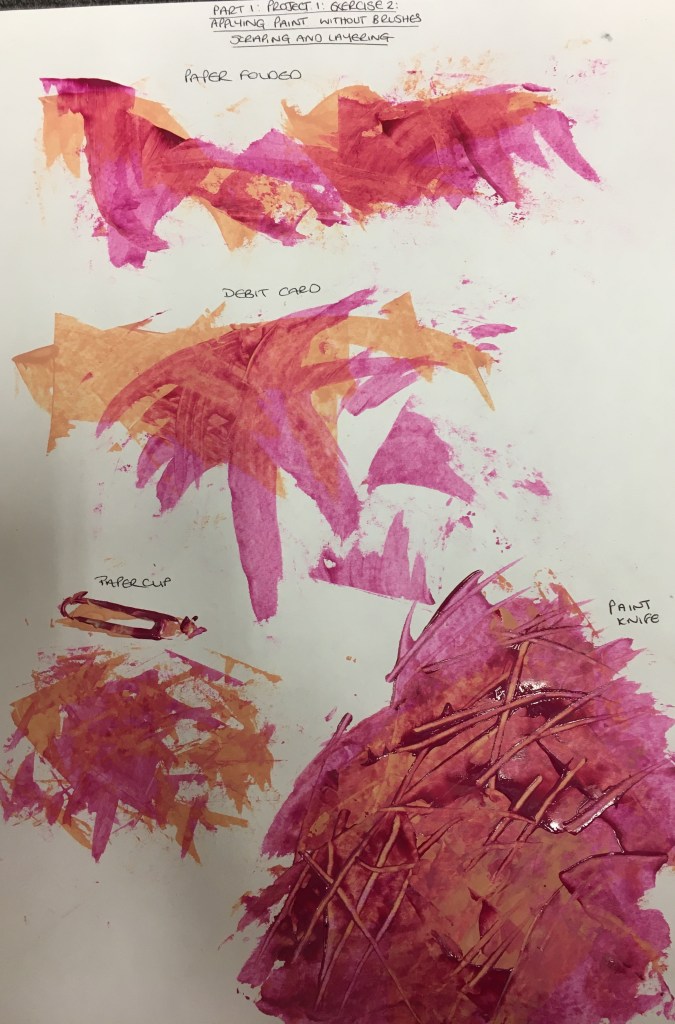
Scraping and Layering 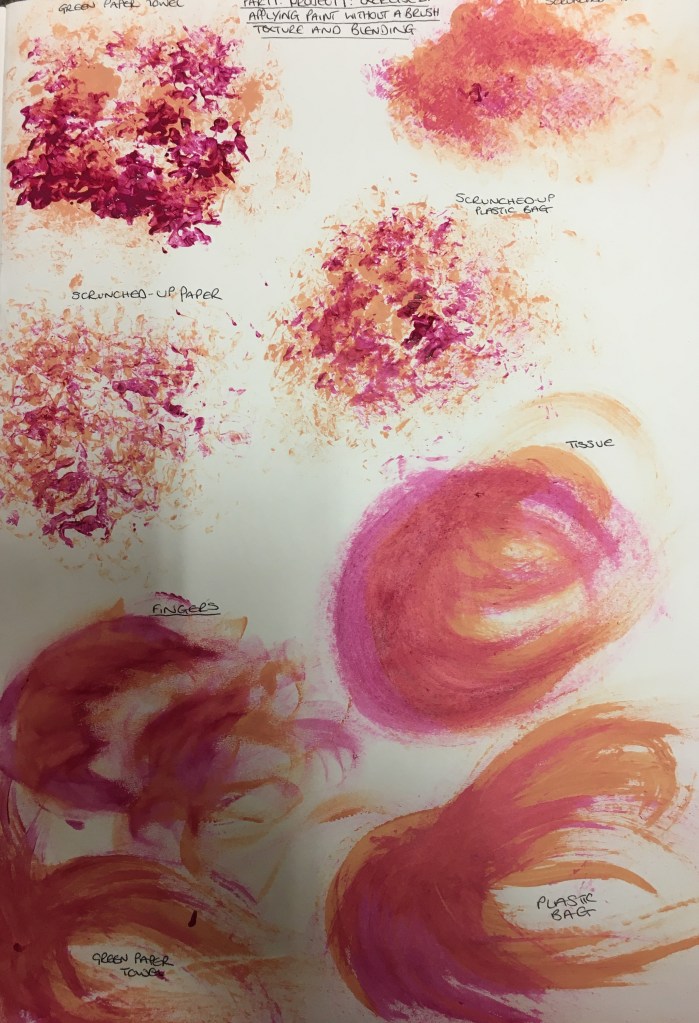
Texture and Blending
I really enjoyed some of the results from this experiment, most notably the scrunching effects which were lovely for layering and creating texture. I also really like the effects the paperclip and palette knife made. I found that the tissue when dabbed would leave some debris on the page, which I felt could be rather useful for some exercises potentially going forward. I was also rather pleasantly surprised that the two random colours I chose to show a contrast between the two were actually rather complimentary to each other and created some lovely tones and values.
Exercise Three: Painting with Pastels
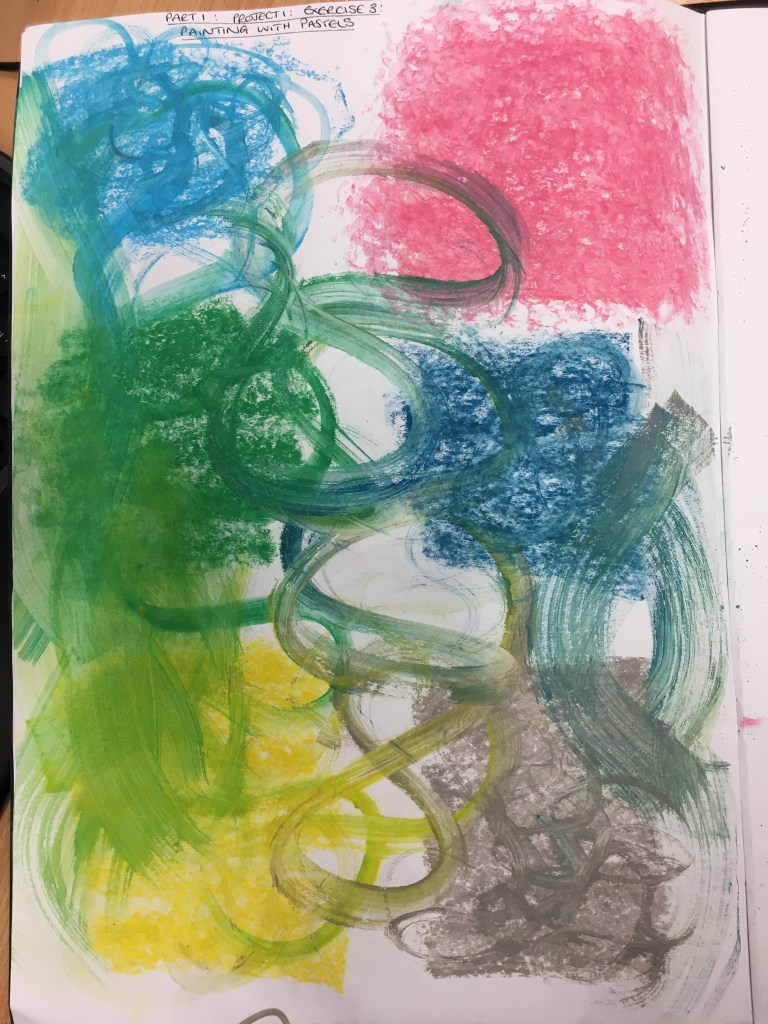
For this exercise, I chose six different coloured soft pastels to experiment with and created squares of each colour. I experimented with different tools for each square and tried to blend the colours in the different sections. For the light blue, I used a medium filbert brush. For the pink, I used a natural sponge in a dabbing method. The green shows a use of a wash brush and medium flat-headed brush. The dark blue was the same wash brush as the green and yellow as well as the flat-headed brush and, finally, the grey had a fine pointed brush.
Simple Piece using Pastels
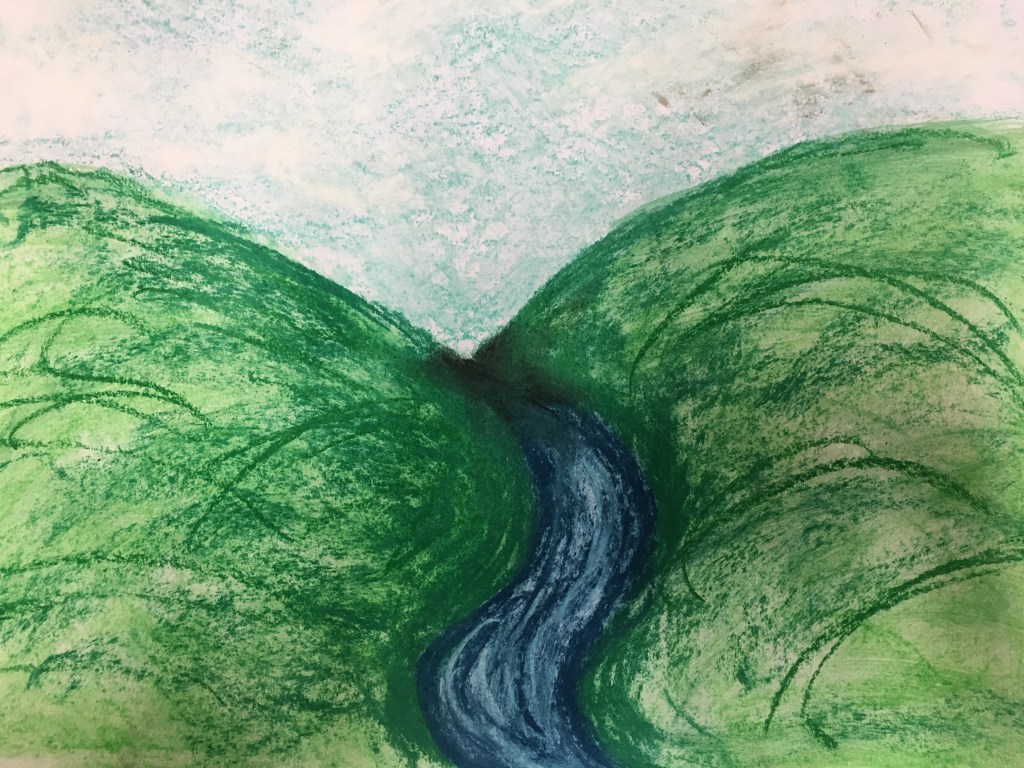
I didn’t want to create anything too in-depth in this experiment and just allowed my arm to do whatever felt natural for the tool in hand and allowed the colours to merge at will. I began by using the side of the blues and greens and then applying a brushstroke wash over the green and then used a sponge to create a speckled effect in the sky. Once this had dried, I then used other colours over the top to create a bit more depth and detail within the piece.
I actually really like this method of painting and can see myself using it throughout my course and in the future. I like the fact you can do so much with the medium and how versatile it really is, but also how easily it will allow you to blend it with another colour. I can also see myself using this to add colour over other media, such as the acrylics or watercolours.
Summary
The main thing I have noticed from these exercises is that the surface used in creating pieces including paint really is important. I used gesso to prime a few of the pages, however, I found that because I had used general cartridge paper, the page was unable to fully support the work being created on it, turning to pulp in the dampest areas. This is something I will really need to bear in mind that, whilst this is ok for preliminary sketches and experiments, final pieces will have to be created on a more robust surface to enhance the end result and to get the best result possible from all included parts.
I will definitely be using the exercises in this project as reference to the types of marks which are capable of being made and the qualities and abilities available from the different media and tools available.
