


I have recently watched two episodes of ‘Life Drawing Live!’ on BBC iPlayer and found it absolutely fascinating! I was quite disgruntled when the first episode aired as I only found out it was on when it was on BBC Four and was over halfway through! I waited for it to arrive on BBC iPlayer and found this was actually much better for allowing me to take notes, having the ability to pause where necessary. Even though I had missed out on the Pose Cams available during the actual live recording, I was able to see the models relatively well during the programme and paused the footage for the duration of time time the artists had for the exercises after first watching the whole thing and jotting down some quick notes provided by the artists, Daphne Todd, Lachlan Goudie and Diana Ali.
Episode One (Aired February 2020)
Notes on History of Depiction of Human Form in Art with Lachlan Goudie
- The Ancient Greeks focussed on recreating an idealised version of the human form and the proportions and used mathematical formulas to measure the latter to be very precise and to create an almost better version of the human form.
- Leonardo da Vinci later built upon the Ancient Greek’s principles by looking inwardly, dissecting around 30 human bodies to gain a deeper understanding of the body’s structure and how this impacted on the way the flesh above it moved and took shape.
- Later, Michelangelo created the sculpture of David with realistic sinews and veins running underneath the skin due to being obsessed with understanding the human form as much as possible.
- In 1768, the Royal Academy opened a life drawing classroom, allowing art students to study the human form, however, whilst there would be female models at this time, it was a further 125 years before female artists were allowed into this room to study the male form.
- The classical depictions of the human form were created to represent an idealised version of the human form which was not actually accurate, whereas modern day artists have been more inspired to look at the accuracy of the human form, including the ‘gritty’ and ‘ugly’ truth, such as wrinkling, aging skin.
- Rubens was an artist who did not want to portray perfection within his work but instead focussed on the movement of the flesh and the sensuality it holds.
- Rembrandt chose to show his own face aging by including wrinkles and flaws to his skin.
- Picasso had been trained in the classical methods by his father, however, he later became completely unconventional in his style and decided to share his take on art by showing the human form as viewed from many different angles, as though looking through broken glass.
- Freud was a more recent artist whose work was heavily influenced by Rembrandt and whom was fascinated by the textures and flaws of the human flesh.
Experts’ Notes on Exercises
- Using a softer line for the background creates a sense of the object being further away, whereas harder lines create the sense that the object is much closer and more defined. There will be less detail further away and more shadowing in the foreground. Dominant shadows in recessive areas will draw the eye to that part instead of the actual aim of the piece and will create a battle between the grounds for dominance.
- Constantly stop and compare proportion sizes against each other to ensure the different areas remain related to each other and accurate.
- If you see a mistake, this is a note to tell you to change what you are doing, even if you just draw over the mistake.
- Just because you know the human form, don’t try to draw what you know, but more what you see and focus on abstract shapes and negative space as opposed to a leg or an arm specifically.
- Begin by marking out where you want the extremities of your subject to be, such as the hands, feet and head. This should be done before beginning and a rough drawing of the whole figure should be drawn to scale quickly before honing in on specific areas.
- Hips and shoulders usually move in opposite ways, which is called ‘contrapposto’, which is Italian and means ‘counterpoise’.
- When drawing hands and feet, don’t leave them to last as you may become lethargic and lose interest. Draw the negative spaces between the fingers and thumbs instead of the actual digits.
- In real life, we can see between seven and nine tones, however, we are unable to replicate these tones fully in monochromatic pieces, so we focus on a base tone (which becomes the middle tone), a darker tone (for the shadowed areas) and a lighter tone created by using a rubber (for the lightest areas of the piece). This type of exercise should be done by creating a base layer with charcoal (for example), then a light sketch of the basic structure of the subject, then squinting the eyes to see the darkest and lightest areas without the unnecessary details.
- With regard to texture, if the object is something soft, use soft marks. If the object is harsh, use harder, bolder marks. In the case of very detailed items, such as stitching, don’t focus on every strand, just create the suggestion of the strands with expressive marks.
- When drawing more than one subject, keep relating back to each and work on them equally to avoid creating two separate images on the same page. Also, the negative space between the two models should be used to assist in getting the correct distances between them. The extremities and general shapes of all subjects should be mapped out before any detail is included to avoid accidentally cutting certain areas of the subjects off of the page (unless this is the intention).
Exercises
During the show, there were a series of exercises aimed at challenging the artists with troublesome topics to consider in their work; line, hands and feet, foreshortening, tone and telling a story within a piece.
Exercise One: Quick Line Study of Standing Male Model – Three Minutes
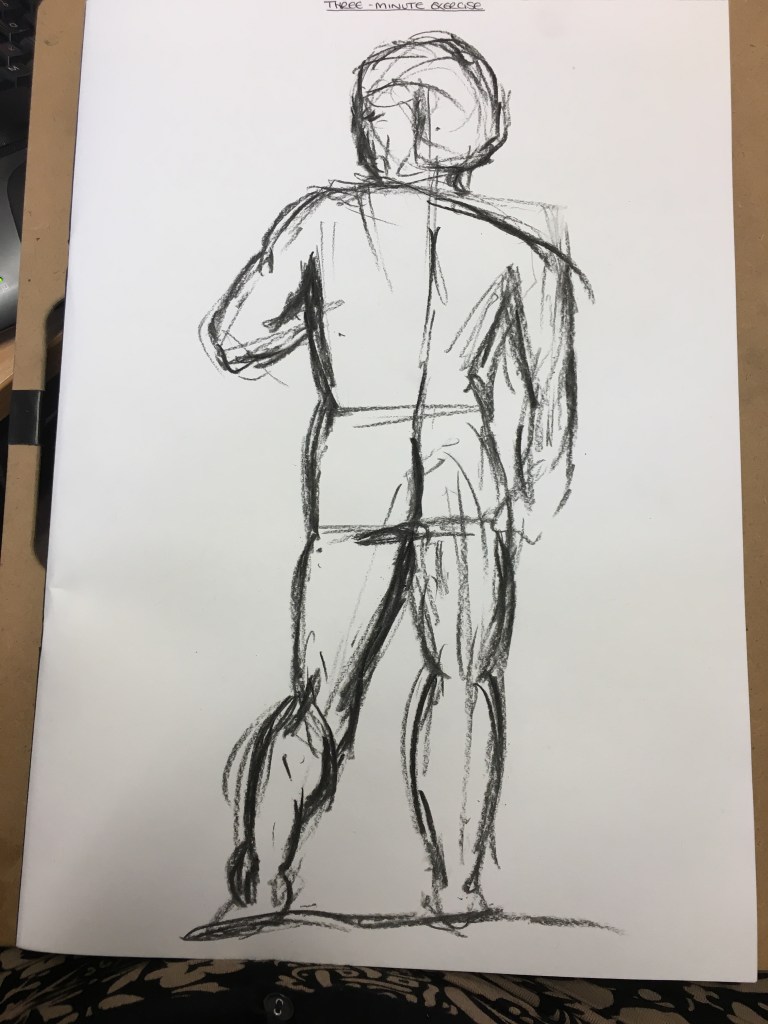
Three-Minute Exercise in Charcoal 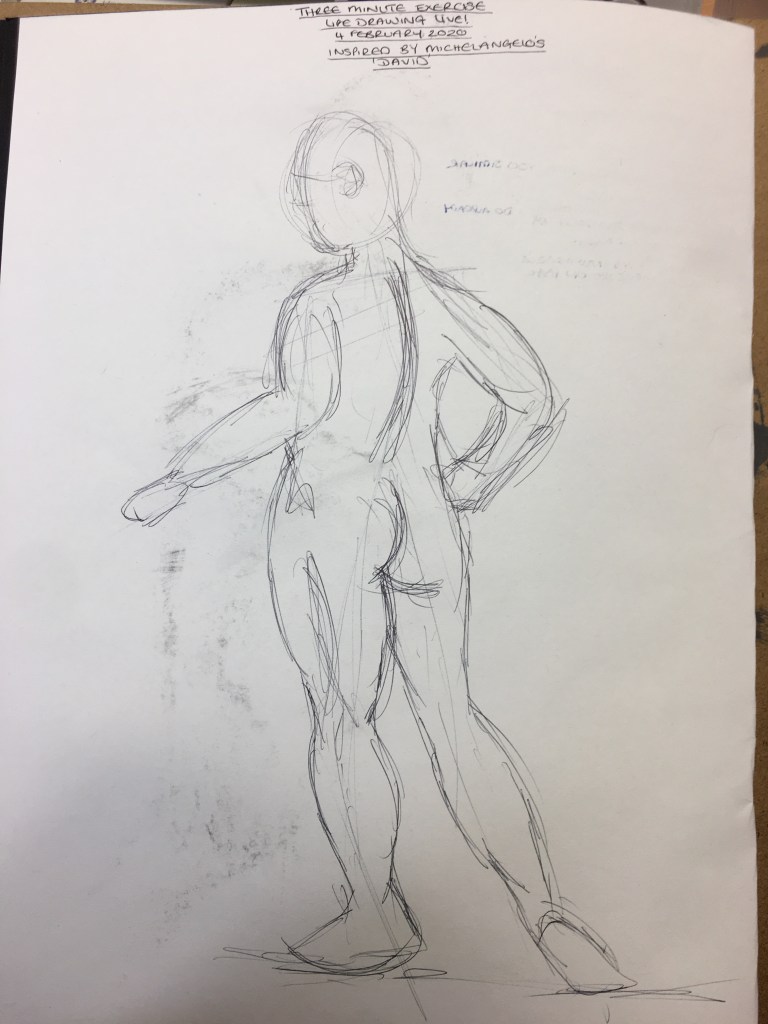
Three-Minute Exercise in Biro
I was unable to get a proper close up view of the model used for the session, but was able to pause the footage on the image of the statue of David in the gallery, which is what I used to create my study in charcoal.
I am actually pretty pleased with the result of this study and think I have managed to get quite accurate generalised measurements of the individual proportions and of the model as a whole.
I then created another study of the actual model in the show although, since I was unable to get a good close up of the model, I think this has had an impact on the sketch as a whole. I do not think the proportions are as well created as with the charcoal study, but I think I have been able to create a less heavy-handed sketch than has been created with the charcoal.
Thinking back to my earlier course and the notes provided by my then-tutor, I can see that my lines in the studies are somewhat fluid, but are still rather short and sharp. These are both things I know I still need to work on, however, I think with such a short space of time, This is just my default mode, so it will be hard to break this cycle. I think I have managed to capture some energy and suggestion of movement within the studies, noting the weight distribution quite well on the model’s right foot in the charcoal study and the left in the biro study too.
Exercise Two: Seated Model – Beginning with Hands or Feet – 12 Minutes
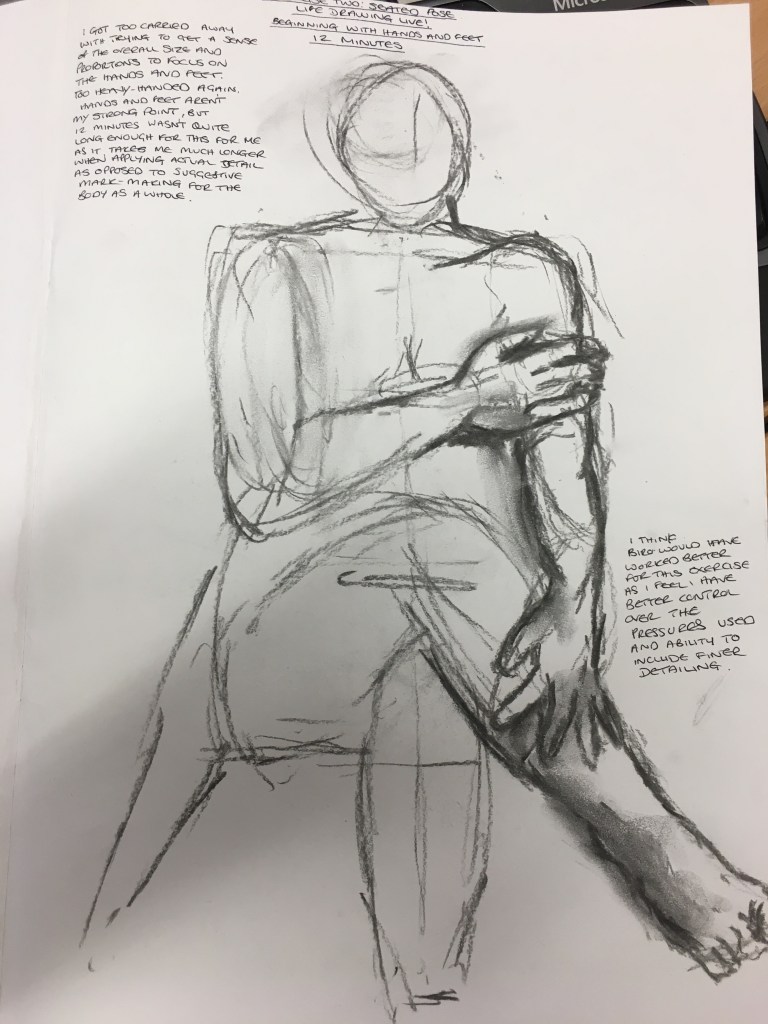
I was rather disappointed with this exercise. I began by creating a rough sketch of the model’s pose and then aimed to concentrate on the hand placed on the arm, and then move on to creating the feet. Whilst I think the hand which is placed on the arm is rather bulky and cumbersome, I think the one on the leg is actually rather dainty and accurate. I think the foot is somewhat accurate and the shadowing helps to give a sense of depth as I tried not to draw an actual foot as opposed to the shapes seen, but I think a little imagination is needed to see it as an actual foot. I was also rather disappointed that I didn’t measure accurately enough to fit the grounded foot onto the page and that I was unable to complete this.
I found that the time for this exercise passed very quickly and that I think charcoal is too heavy in my hand to be able to create the delicate attention to detail needed for these parts of the body. Working in a very small way does not work too well for me and I feel I need much more practice with this.
Exercise Three: Foreshortening – 15 Minutes
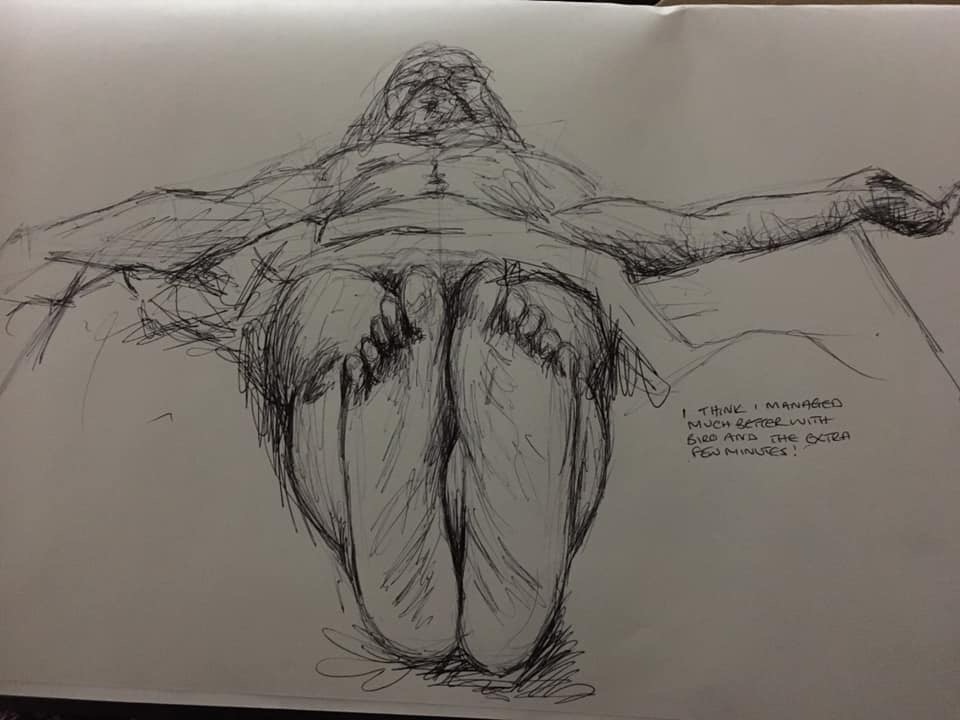
This has to be my favourite exercise by far! I ran out of time towards the end and did not measure too accurately the scaling of the figure, as the model’s right hand would have been cut off had I had time to finish this. I began the piece with the feet and worked my way back up towards the head. I think this has actually helped as I was unable to spend time adding too much detail to the model’s head and torso (which I feel I would have actually done if given longer!) which I feel has actually added to the suggestion of distance and recession. I fear that perhaps I have included slightly too much detail in the model’s left hand, as this was finished roughly at the end of my allotted time and may draw the viewers eye in the wrong direction, as opposed to the feet and then upwards to the torso and head.
Overall though, I feel this is an amazing technique for me since I am not too good at creating detail within smaller versions of the hands, feet and head, but am with the body itself, so perhaps this is something I should try and use more often in my pieces to turn my weaknesses into my strengths.
Exercise Four: Standing Model – Tone – 10 Minutes
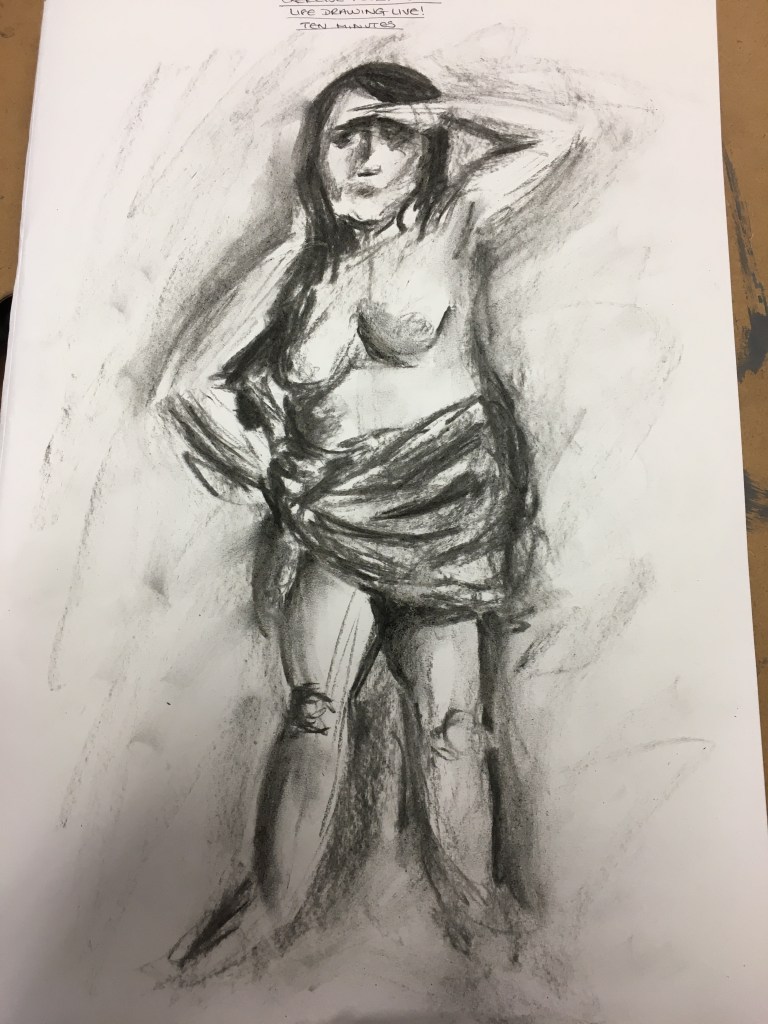
Beginning this exercise, I did not follow the instructions properly (which I was kicking myself for during the sketching!), however, I tried to create the piece by drawing a rough scale of the model and pose with the edge of my charcoal, but then moving on to use the side of the charcoal to draw in the darkest tonal areas. I tried to keep the lightest parts completely untouched and added a background layer of charcoal to assist in creating the depth of the form away from the paper. Looking at the finished piece, I think the measurements are barely accurate and that the model seems shorter towards the lower end of the study. Once again, I feel I have been much too heavy-handed. I think perhaps using charcoal for detail as opposed to tone is not quite my strongest area.
I don’t think this is as successful as it could be, but will definitely give the actual exercise a go when I have more time and, hopefully, I will be able to achieve much better results.
Exercise Five: Masterpiece – Telling a Story – 23 Minutes
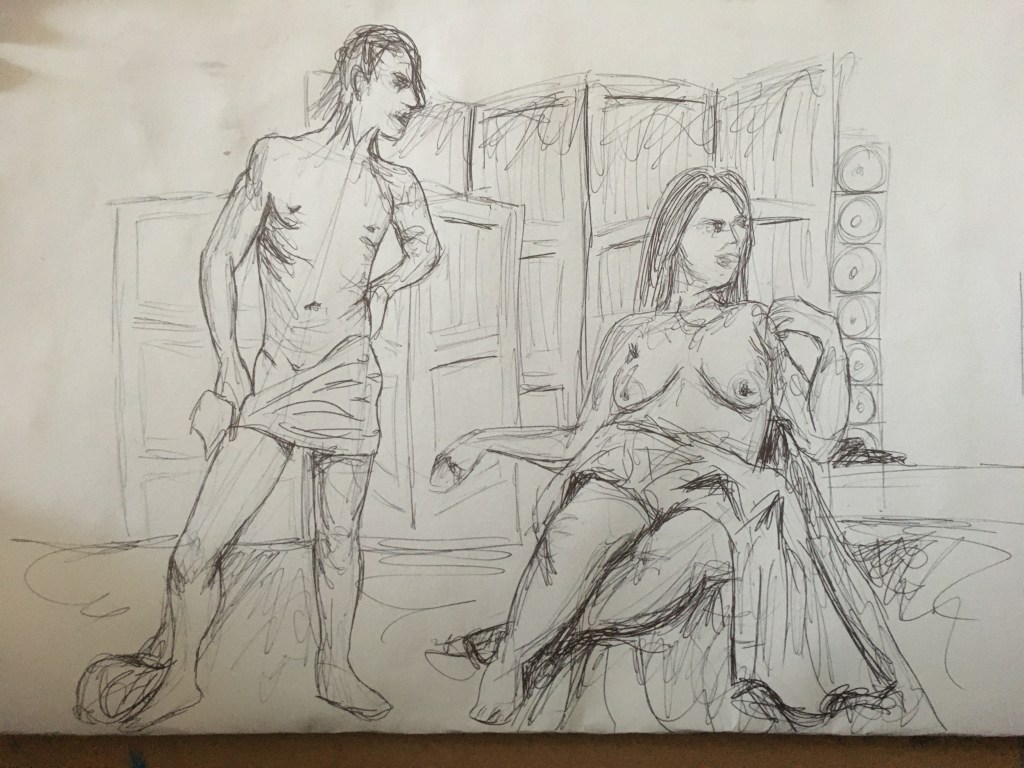
I really enjoyed this exercise and the fact there were two models to try and measure up against each other and to try to place well in relation to each other. I decided to work in pen for this exercise due to it beign my preferred choice for longer studies.
Overall, I think I have been rather successful in the measurements and placement overall, as well as the depth within the setup. I think I have been able to capture the story being told well and this is something I would definitely like to return to in the future.
Episode Two (Aired May 2020)
I was a little disappointed with this episode as I did not find much in the way of advice provided throughout the show, however, I made the most of the exercises available, as follows:
Exercise 1: Quick Exercises – 30 Seconds / 30 Seconds / 1 Minute)
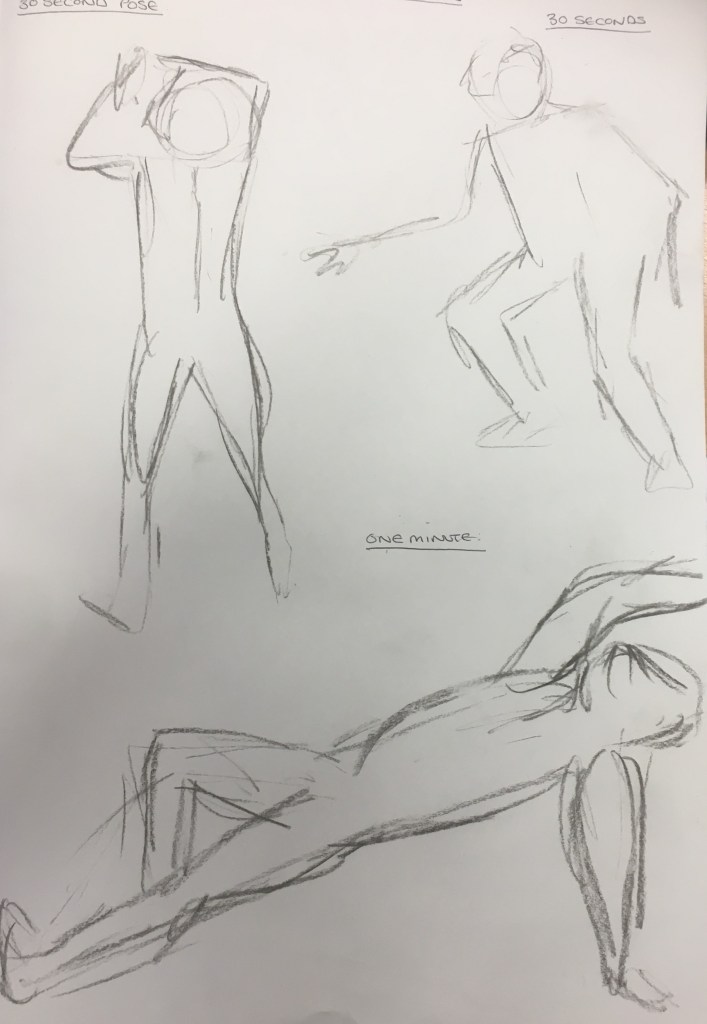
For this exercise, I was to carry out three quick studies, two which were 30 seconds long and one which was a minute long. I really enjoyed the freedom found from doing these quick studies and think I have managed to get a good resemblance of the models without too much concentration on anything specific for too long. I have also noticed through doing these sketches that I have really loosened up on my use of quick lines, instead focusing on longer, more fluid lines as suggested by my previous tutor to avoid making the human form too angular. My current tutor has also advised me regarding this and the use of my shoulder as opposed to my hand to draw. I think this is an apparent step in the right direction.
Exercise 2: Venus – 6 Minutes

For this exercise, I was allowed six minutes to create my piece. Again, I tried to use long, fluid lines as opposed to short, sharp ones and tried to focus more on the tonal areas within the subject matter. I was actually really pleased with the outcome of this piece as, generally observing, it does not look much like the human figure due to the foreshortening and angles, however, with the addition of the tonal patches, I think I have managed to add a certain amount of depth and create the illusion of a real human form.
Exercise 3: Bachus – Highlights and Shadows – 10 Minutes
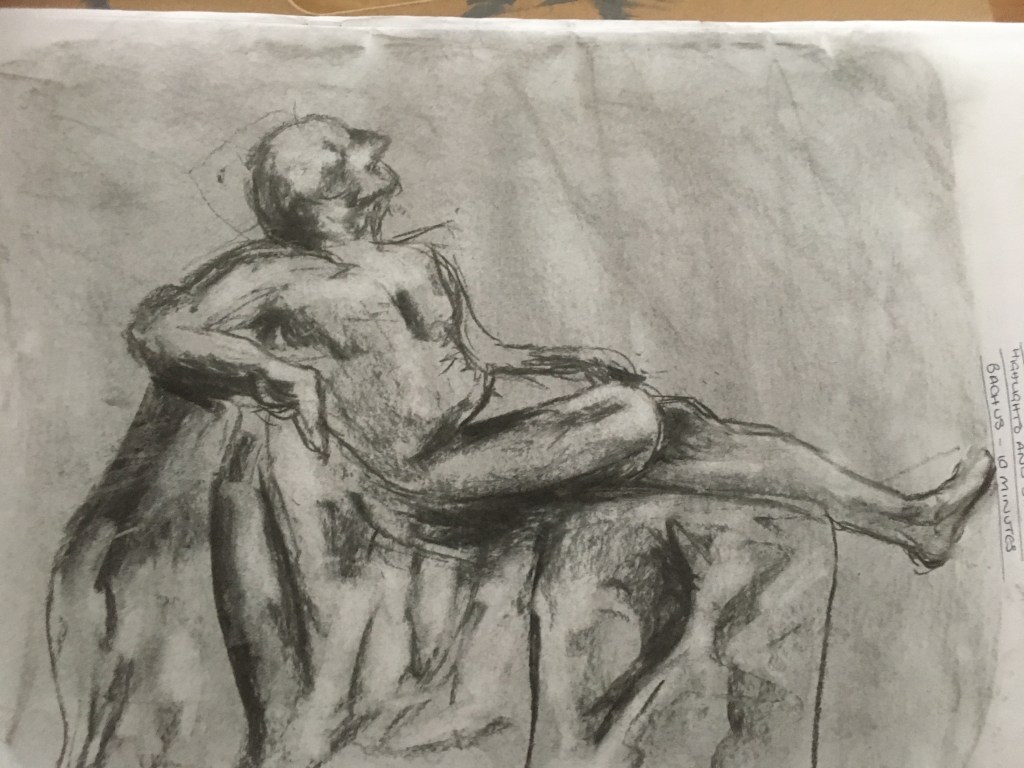
Again, for this exercise I was to draw on the highlights and shadows within the piece except this time I was to use a neutral ground to work on as the base of the skin’s general tone. I was then to add the darker tonal areas and the highlights.
I began by creating a base colour using charcoal, then proceeded to drawing only the darker tonal patches, proceeded by lifting the highlighted areas.
I think I have been rather successful in creating depth within this piece, however, I think I still need to work on creating different depths of tone. I think working quickly like this, however, does really allow you a sense of inhibition and ability to see only the essential information without over complicating the piece.
Exercise 4: Cello – 12 Minutes
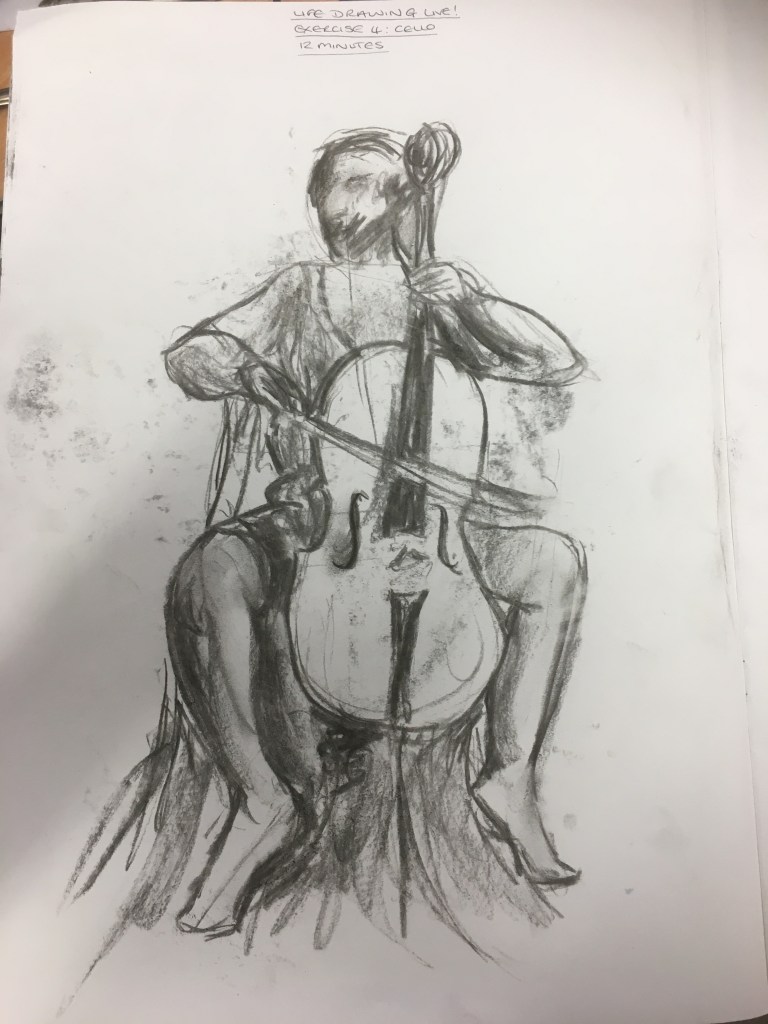
For this exercise, I was to try and create the piece by constantly measuring the cello against the human form and considering trying to portray the musical nature of the subject matter.
I think I have been quite successful at once again creating more fluid lines and an accuracy with the measurements, which I feel help create a sense of depth, specifically where the legs meet the cello and torso. I feel the head is slightly too small for the overall piece, however, I ran out of time before I could correct this. I also think the model’s right foot is slightly too large, however, this does assist with the idea of foreshortening within the piece.
Exercise 5: Narcissus – Chiaroscuro – 10 Minutes
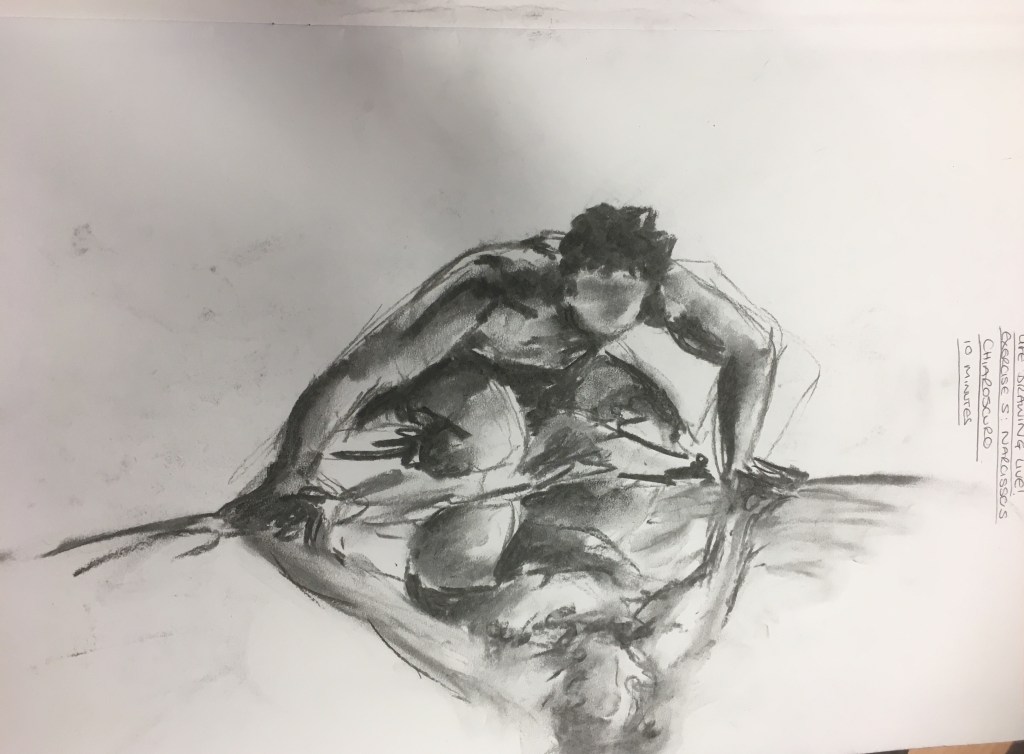
For this exercise, the focus was on the chiaroscuro and reflection aspects of the subject matter.
I think I have created a really interesting representation of the model and the reflection is rather believable. I really enjoy leaving the face to the imagination and working in the darker tonal patches. I think I am still possibly a little too heavy handed, however, I think this has been a rather successful exercise.
Exercise 6: Heroine – 19 Minutes
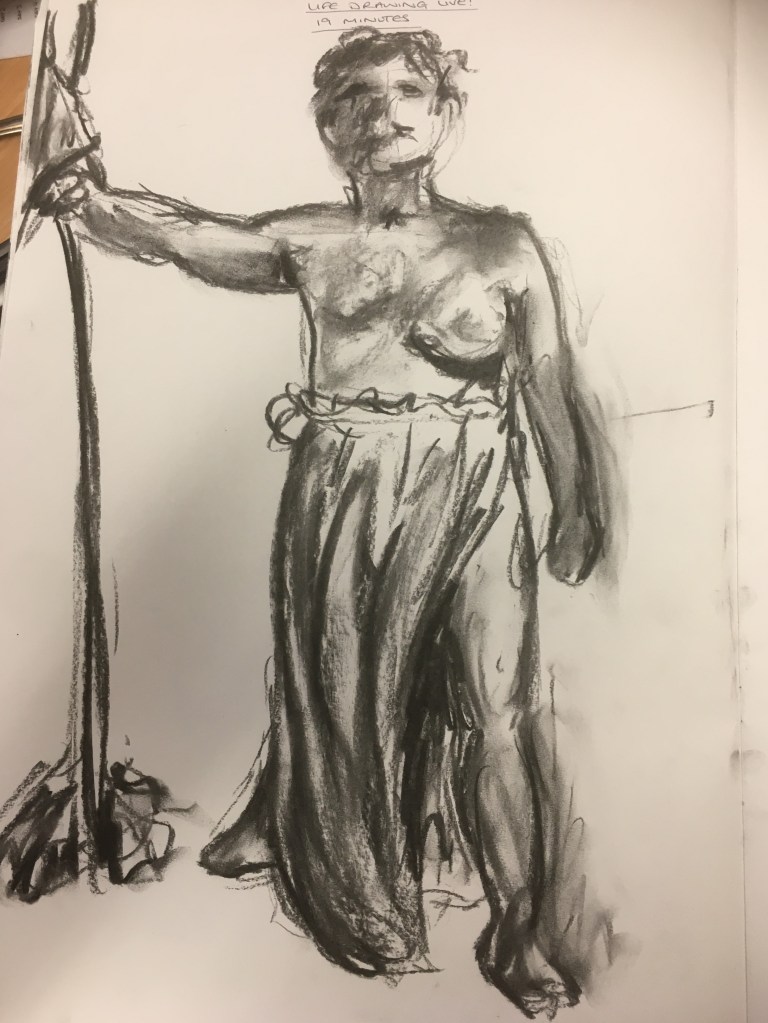
This exercise was to portray a heroine who was a breast cancer survivor. The model was holding a flag as a prop to assist in the illusion, however, I felt the model’s presence itself was extremely powerful, hence I did not include too much focus on the flag.
Once again, I think I have been a little too heavy handed, however, I think I have created a good amount of tonal depth (whilst accidentally overworking certain areas) and foreshortening to make a believable and powerful stance for such a strong individual.
Bibliography
Life Drawing Live! (2020) [Television programme online] d’Arby, J, Todd, D, Goudie, L and Ali, D. BBC iPlayer. At: https://www.bbc.co.uk/iplayer/episode/m000f1km/life-drawing-live (Accessed on 7 February 2020)
Life Drawing Live: Pose Cam (2020) [Television programme online] d’Arby, J, Goudie, L and Ali, D. BBC iPlayer. At: https://www.bbc.co.uk/iplayer/episode/m000j6xn/life-drawing-live-pose-cam (Accessed on 1 July 2020)

One thought on “Notes from Life Drawing Live! Episodes”